Android to Arduino Data Send via Bluetooth Serial - Part 1
This has been done to death but most posts/blogs seem to not show a few steps or give little explanation in to what is happening.This may help anyone beginning such things.
The intention is to connect an LCD display and Bluetooth module to an Arduino so that it can receive and display information using the LCD and inbuilt LED. I will then show you how to make a simple app to control these features. By doing this you should be able to make alterations and create your own hardware and app (most likely better than mine). I am no expert but I have finished this project and it all works. By the end of of it you should have something that looks like this: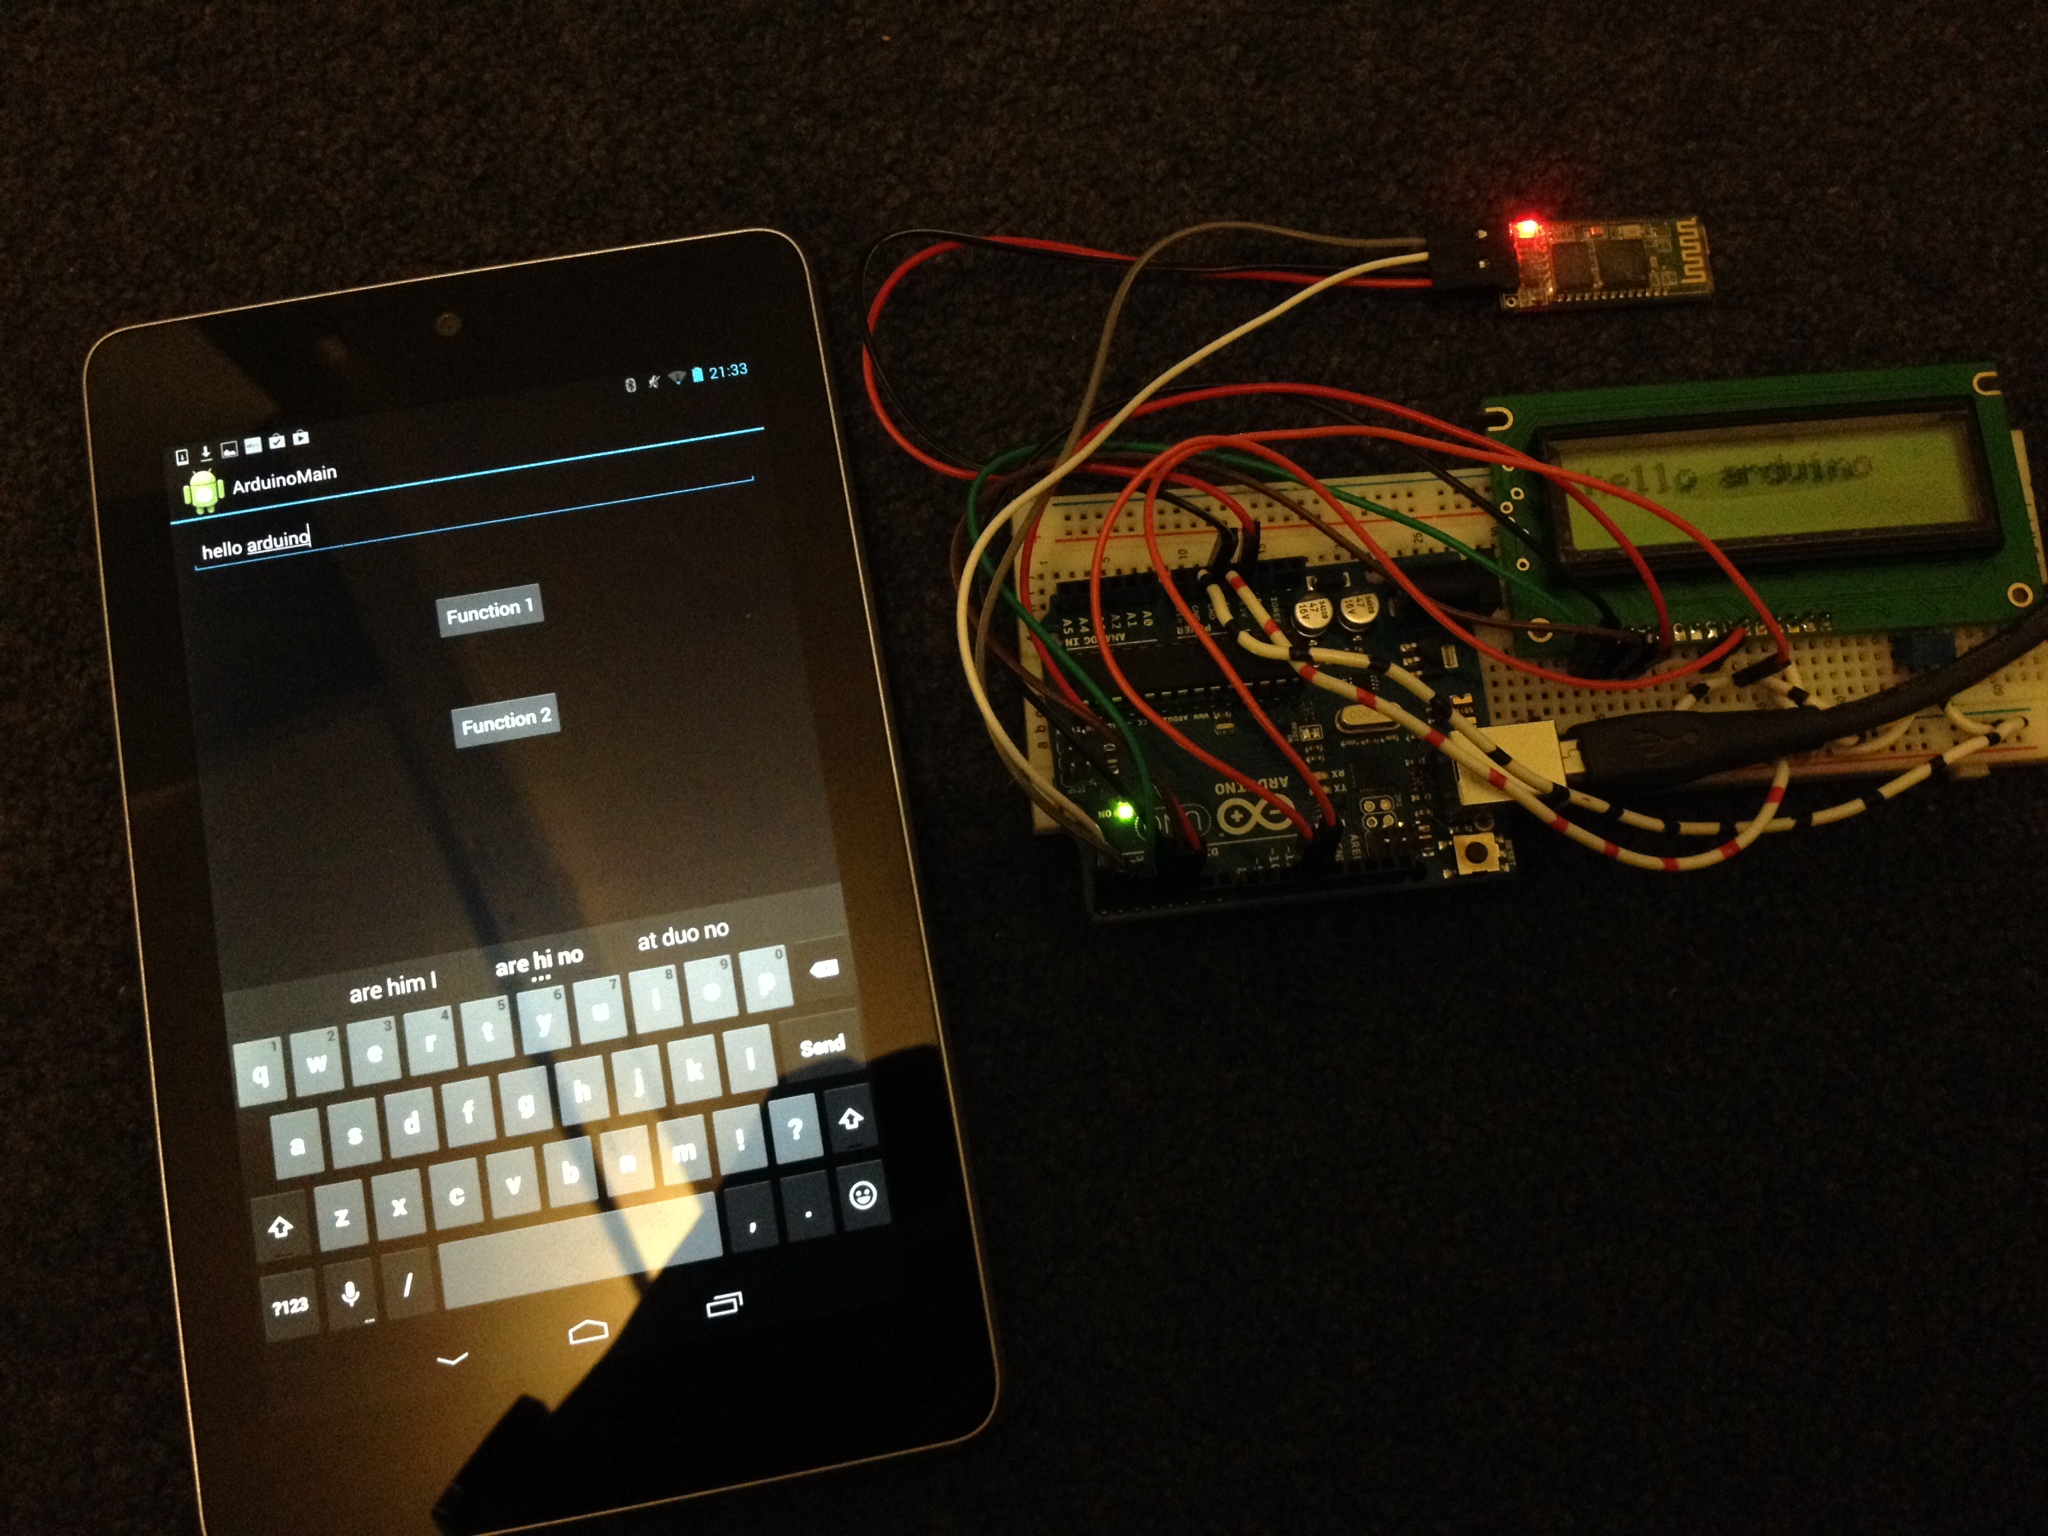
This post is pretty simple but I would recommend making sure you are ok with making a very basic Android app and serial comms on the Arduino before continuing. This website looked good to me for the serial stuff.
You will need an Arduino, some jumper wires, a PC/Mac with Eclipse and an Android device with bluetooth connectivity ( I haven't seen one without yet!).
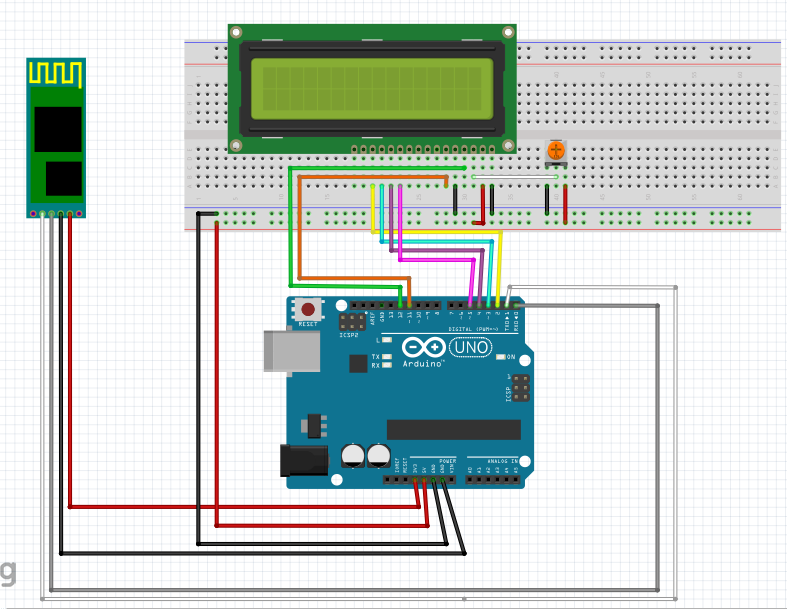
Lets get the simplest thing out of the way first. Create a circuit like the one below. I would check your Bluetooth and LCD pinouts though, as these vary by manufacturer. Pay attention to the fact we are using the default Tx and Rx pins for our serial comms. If you try to program your Arduino with the BT module plugged in to these it will most likely fail. Either take the Tx and Rx out when programming or use software serial on two other I/O pins for the Bluetooth module.
Test the LCD by using one of the examples in the Arduino software - it will be annoying to think the whole thing failed due to a poorly connected LCD!
To test the BT module (BT = bluetooth, tired of typing it!) just use search on a BT enabled device and find your BT module (mine was HC-06 by default with 1234 as its pairing password). If you pair with the device the flashing LED on the BT module will go solid showing you have a connection. This probably won't work on iPhones though as they don't support the BT serial profile.
Below is a basic Arduino sketch that will read the serial transmission from the serial Tx pin (soon to be the Bluetooth tx pin). If the incoming serial transmission is an ASCII '1' the LCD will display 'function 1' and the inbuilt Arduino LED will turn on (pin 13 = high). If an ASCII '2' is received the LCD will display 'function 2' and the LED will turn off (pin 13 = low). If a '*' is received any following text will be displayed on the LCD. So to write hello you would send '*hello'. The default serial Baud rate of my BT module was 9600 but check yours and adjust Serial.begin appropriately.
// include the library code: #include

// initialize the library with the numbers of the interface pins LiquidCrystal lcd(12, 11, 5, 4, 3, 2);

char inbyte; //Setting a char variable as inbyte int LED = 13; //LED on pin 13

void setup(){ // set up the LCD's number of columns and rows: lcd.begin(16, 2); // initialize the serial communications: Serial.begin(9600); digitalWrite(LED, LOW); // initialize the LED pin as an output pinMode(LED, OUTPUT);

}

void loop() { // When a character arrives on the serial port this will be true if (Serial.available()) { // wait a bit for the entire message to arrive delay(100);

//store the first character in var inbyte inbyte = Serial.read(); if( inbyte == '1' ) function1(); //if the byte is an ASCII 0 execute function 1 if( inbyte == '2' ) function2(); //if the byte is an ASCII 9 execute function 2

//if it is \* then we know to expect text input from Android if (inbyte == '\*') { //clear lcd screen lcd.clear(); // read all the available characters while (Serial.available() > 0) { // display each character to the LCD lcd.write(Serial.read()); } } } }

void function1() { //Enter what you want the command to initiate (e.g LED, Servo etc) digitalWrite(LED, HIGH); lcd.clear(); lcd.write("Function 1"); }

void function2() { //Enter what you want the command to initiate (e.g LED, Servo etc) digitalWrite(LED, LOW); lcd.clear(); lcd.write("Function 2"); }
By the way you don't have to use the '*' method for text it is just a quick thing I implemented to distinguish between commands and text.
To test the full Arduino and BT module connectivity you will need to install Amarino or similar on to your Android device. Make sure your BT module is paired with the Android device and open the Amarino program. Select 'add BT device' at the bottom, chose your BT module, press connect and then press the monitor button. In monitor, type in a 1 in the text field and press send. The LED on the Arduino should come on and the screen should read 'function 1'. Send a 2 and it should go off and the screen should read ' function 2'. Type '*hello' and hello should be on the LCD screen.
If all has gone to plan you should now have something like this (perhaps less messy):
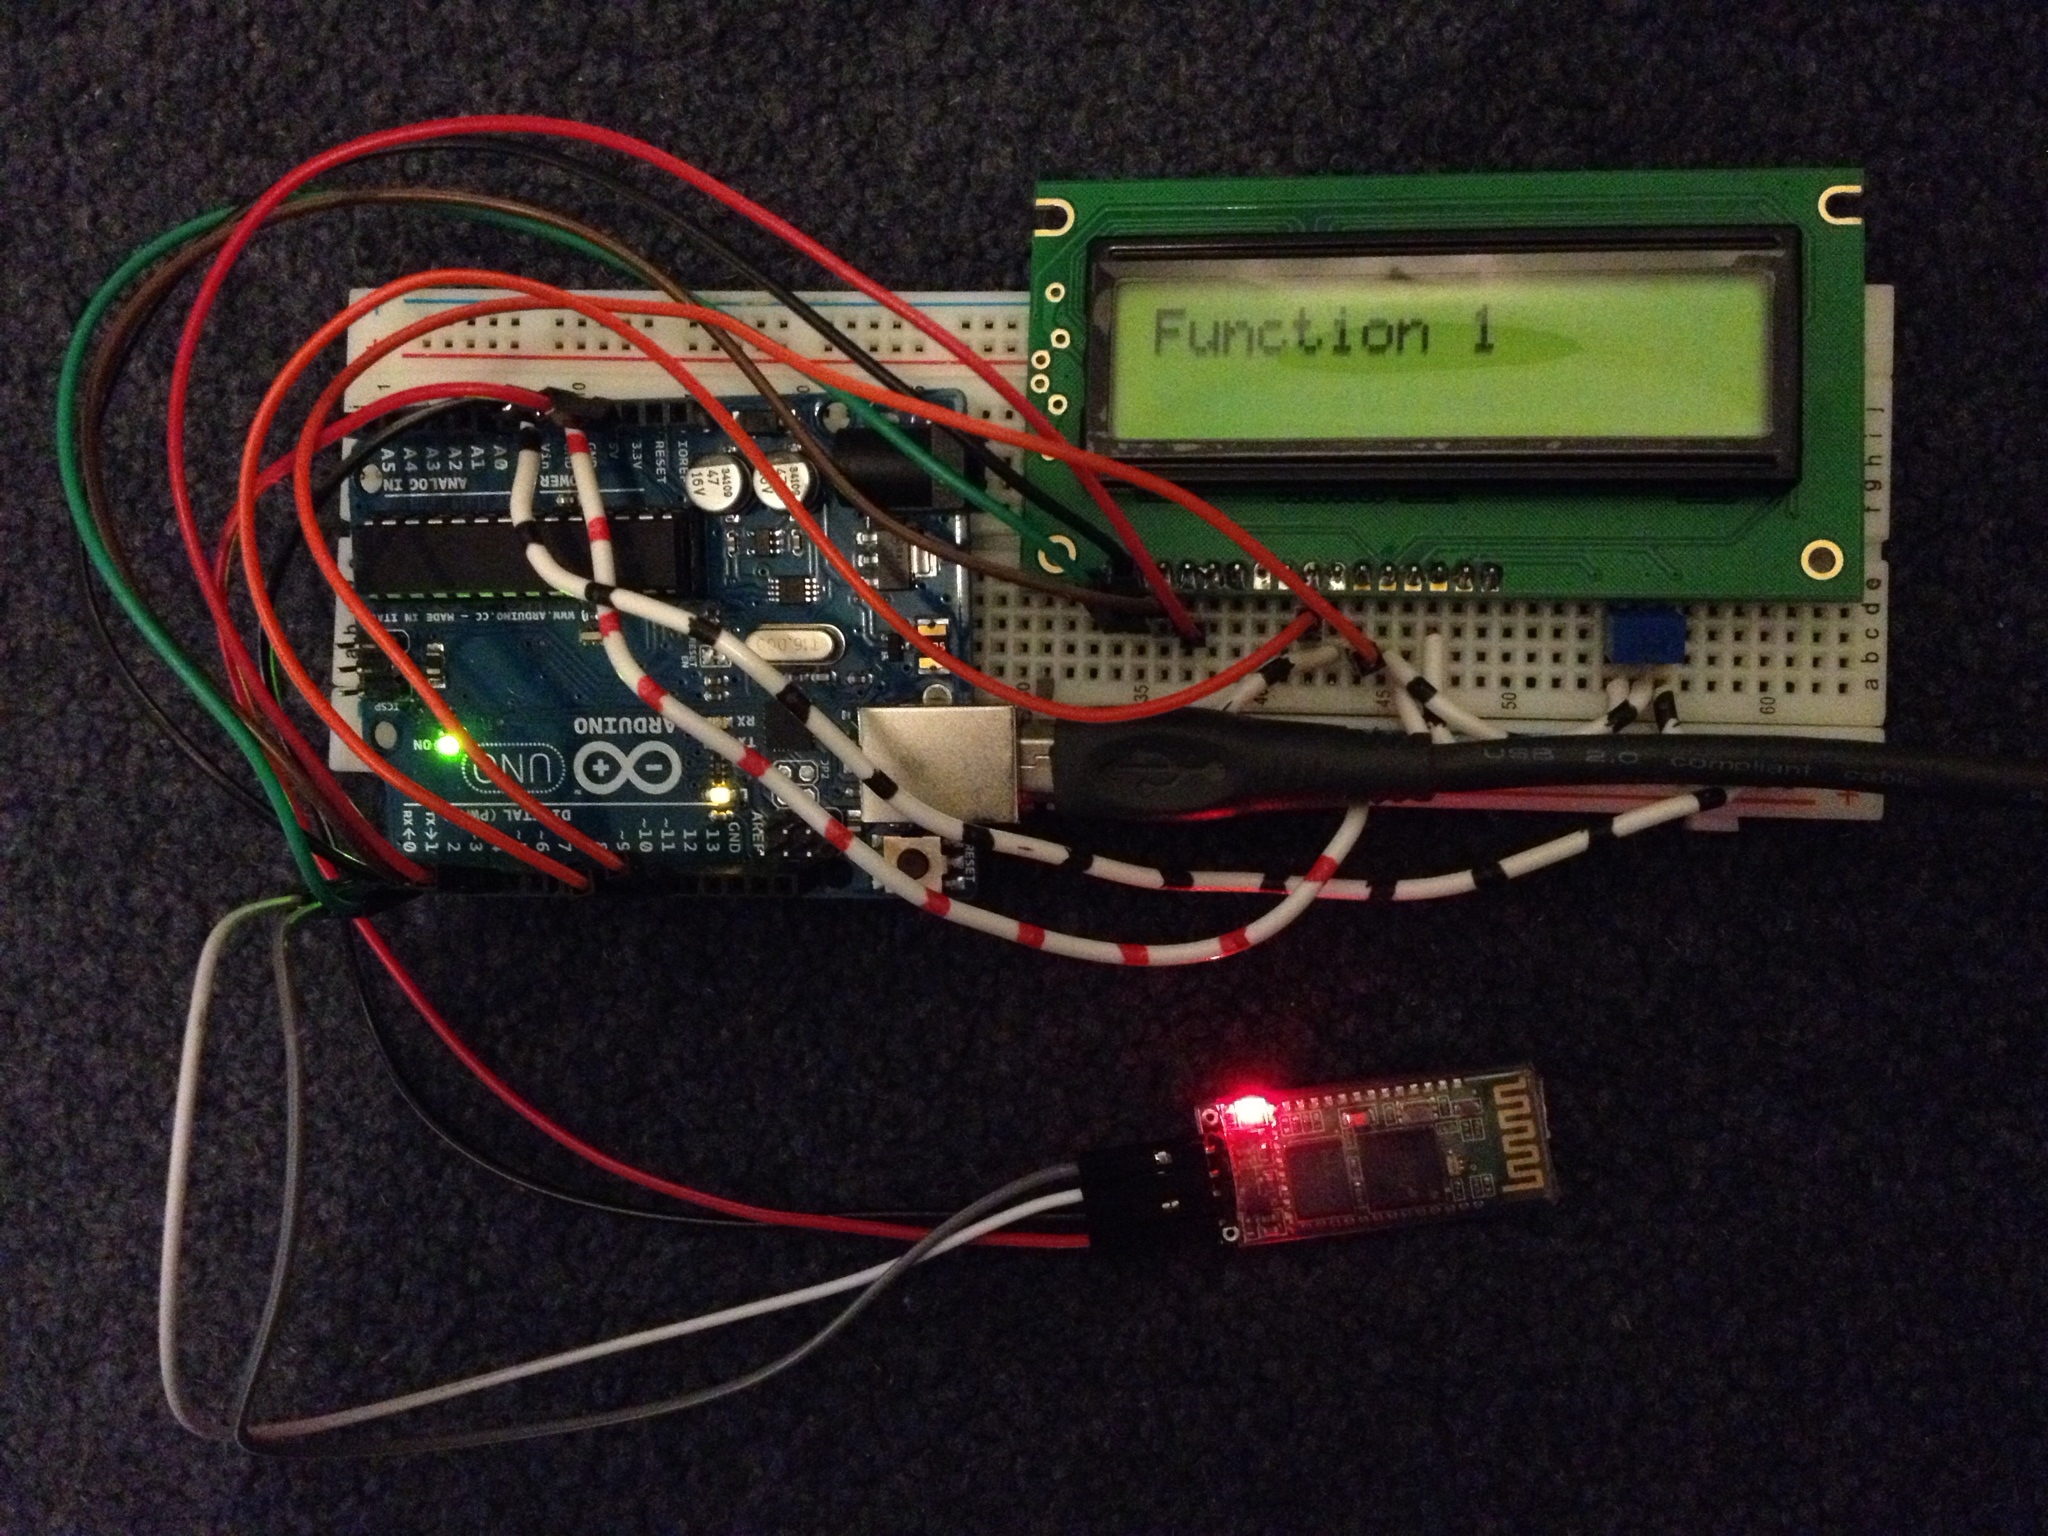
Like my carpet?
If the LED did not come on, first disconnect the BT module and use the serial monitor in Arduino, while the program is running send a 1 or a 2 to check your sketch works ok. If that is ok check that your BT module is behaving like it should - most have an online datasheet showing behaviours and commands for troubleshooting etc. This is also where you will find information on how to change the device name, PIN and Baud etc. This post was EXTREMELY useful.
Now see part 2 to move on to the fun part, Android.